- START WINDOWS POWERSHELL:
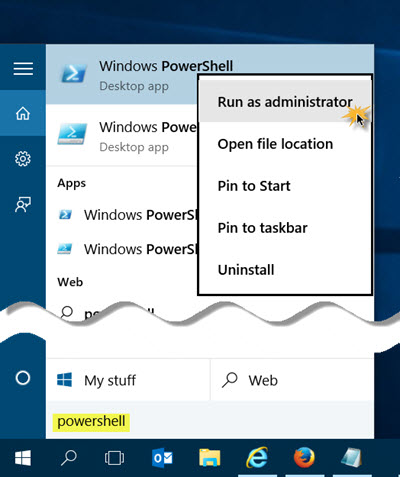
- Hold start-menu (Windows logo) key and start searching for "Windows PowerShell", but do not yet select
- Under "Best Match", right-click on "Windows Powershell" and in the resulting menu select "Run as administrator"
- (You may have to enter your username and password before PowerShell will start.)
- ENABLE THE LINUX SUBSYSTEM:
- From within the Windows PowerShell, enter the following:
Enable-WindowsOptionalFeature -Online -FeatureName Microsoft-Windows-Subsystem-Linux
- After the progress completes, type "y" to restart your computer.

- From within the Windows PowerShell, enter the following:
- INSTALL THE LINUX SUBSYSTEM:
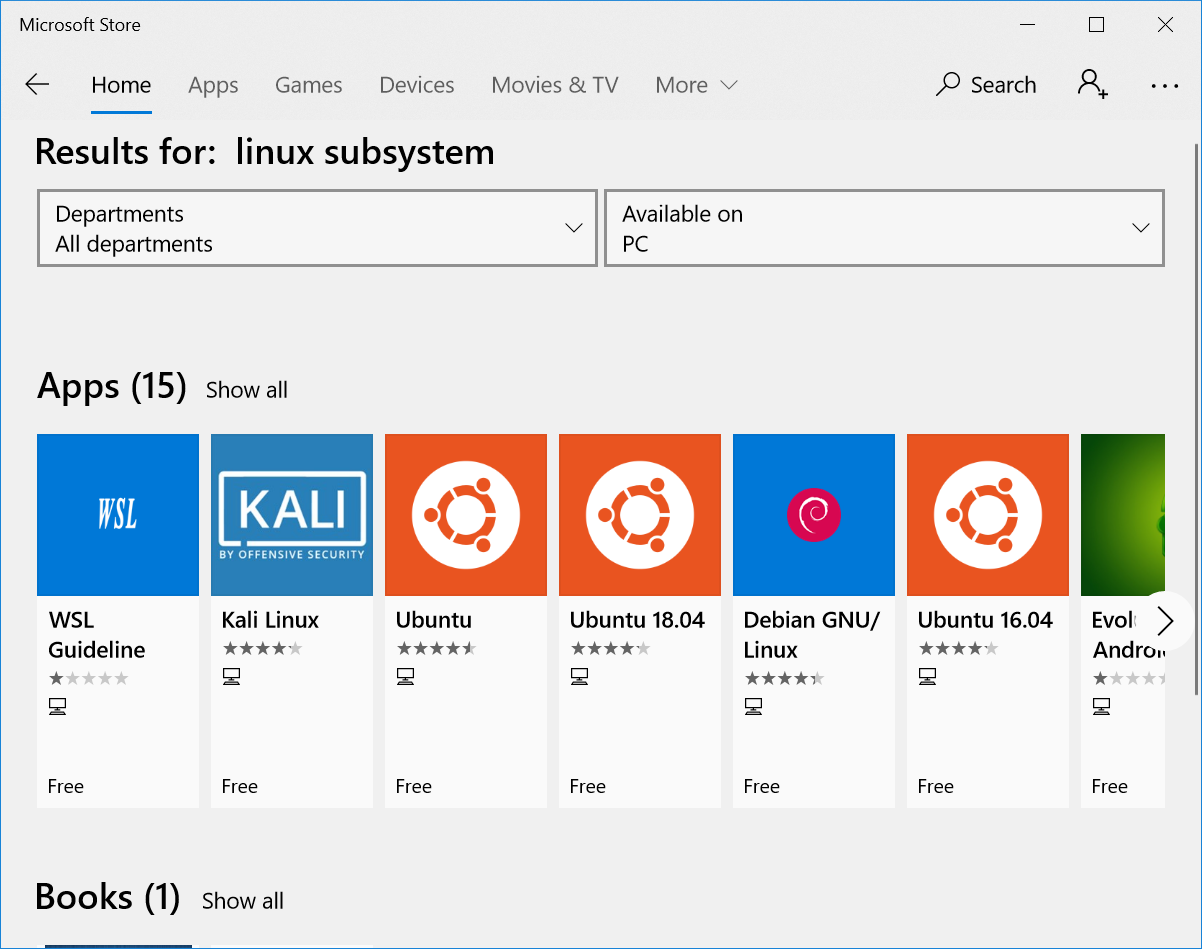
- Open the Microsoft Store by hitting the start-menu key and typing "Microsoft Store".
- In the resulting app, search for "linux subsystem", and then
click on the "Ubuntu" option. (Ubuntu is a version of Linux and
will provide the tools you need.)
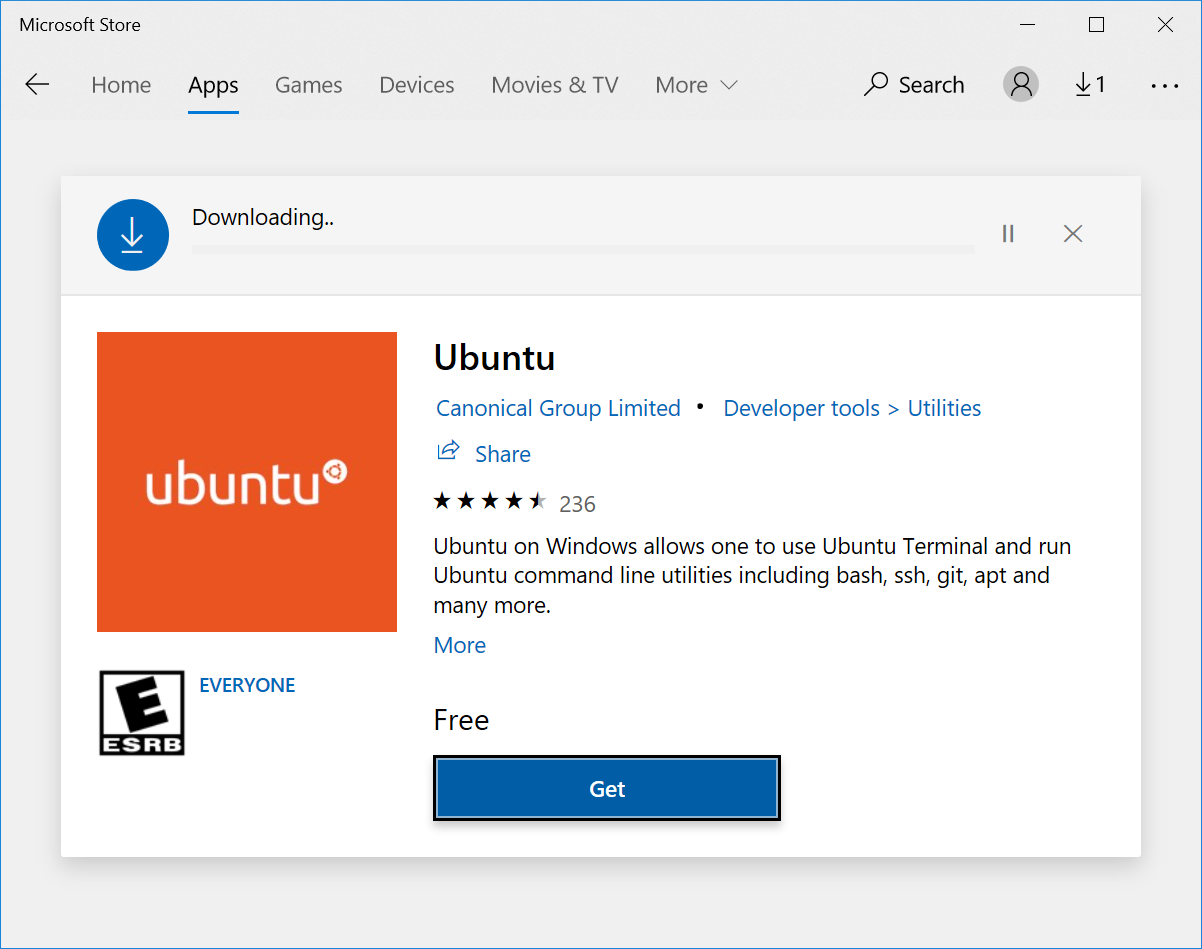
- In the resulting window, click on "Get". (You may need to
authenticate with your username and password again.)
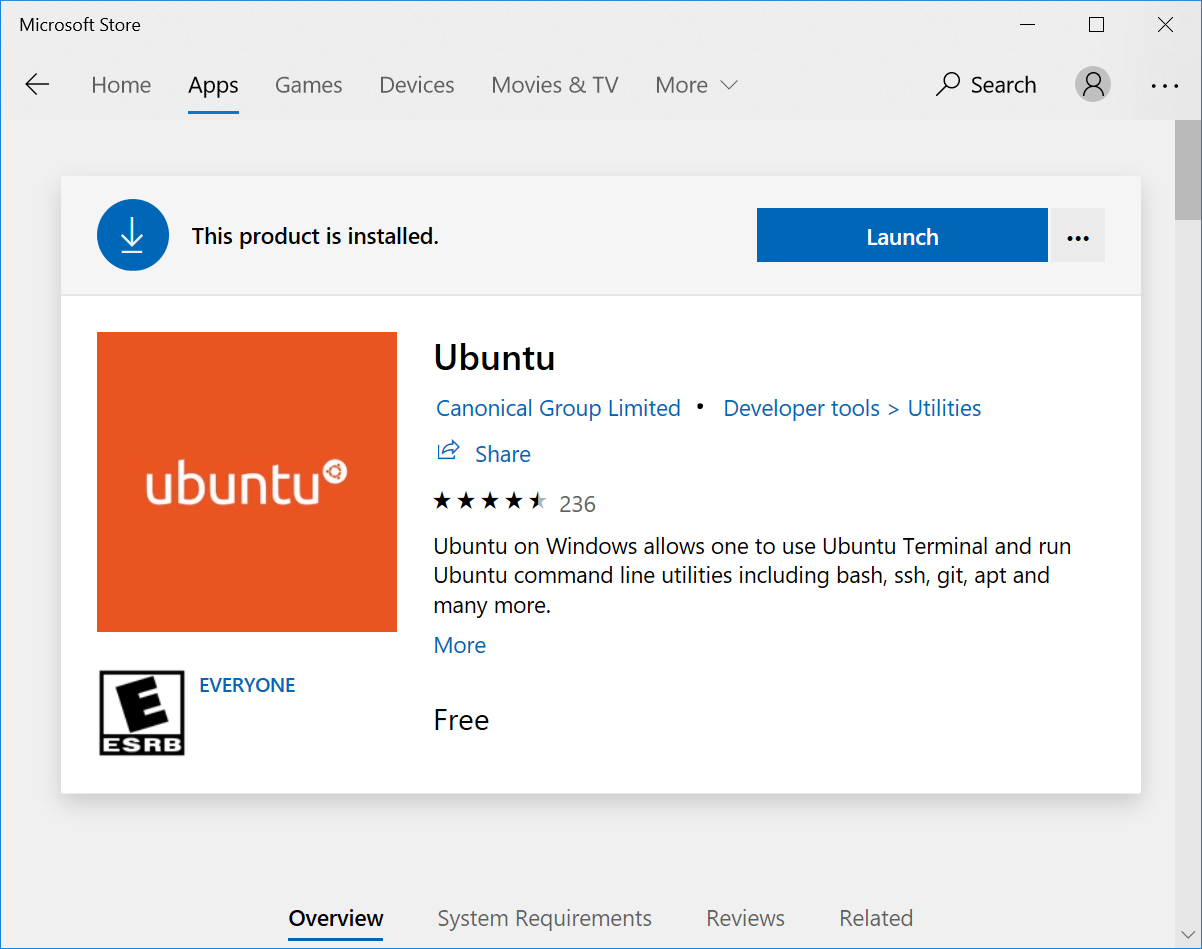
- After Ubuntu is intalled, click "Launch" to start Ubuntu.
and password again.)
- A terminal should open, indicating that Ubuntu is being installed...
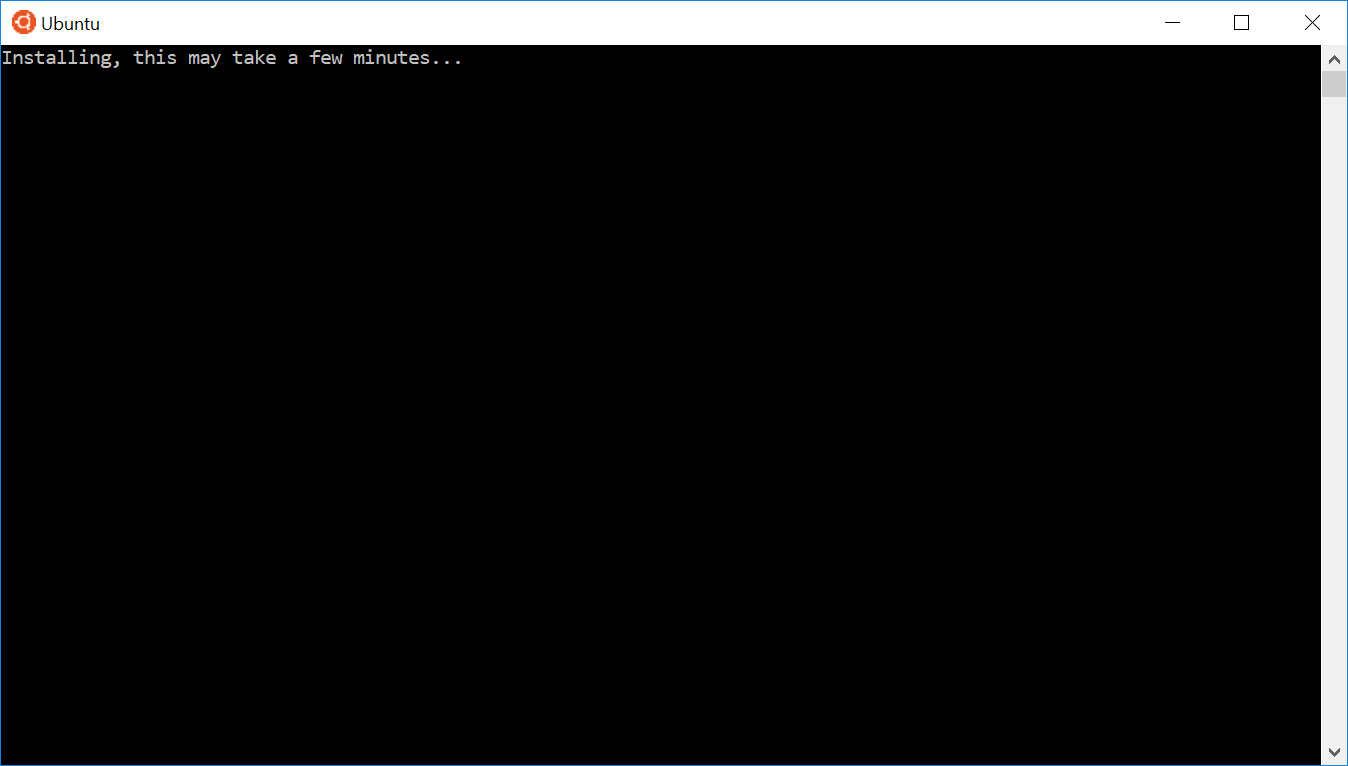
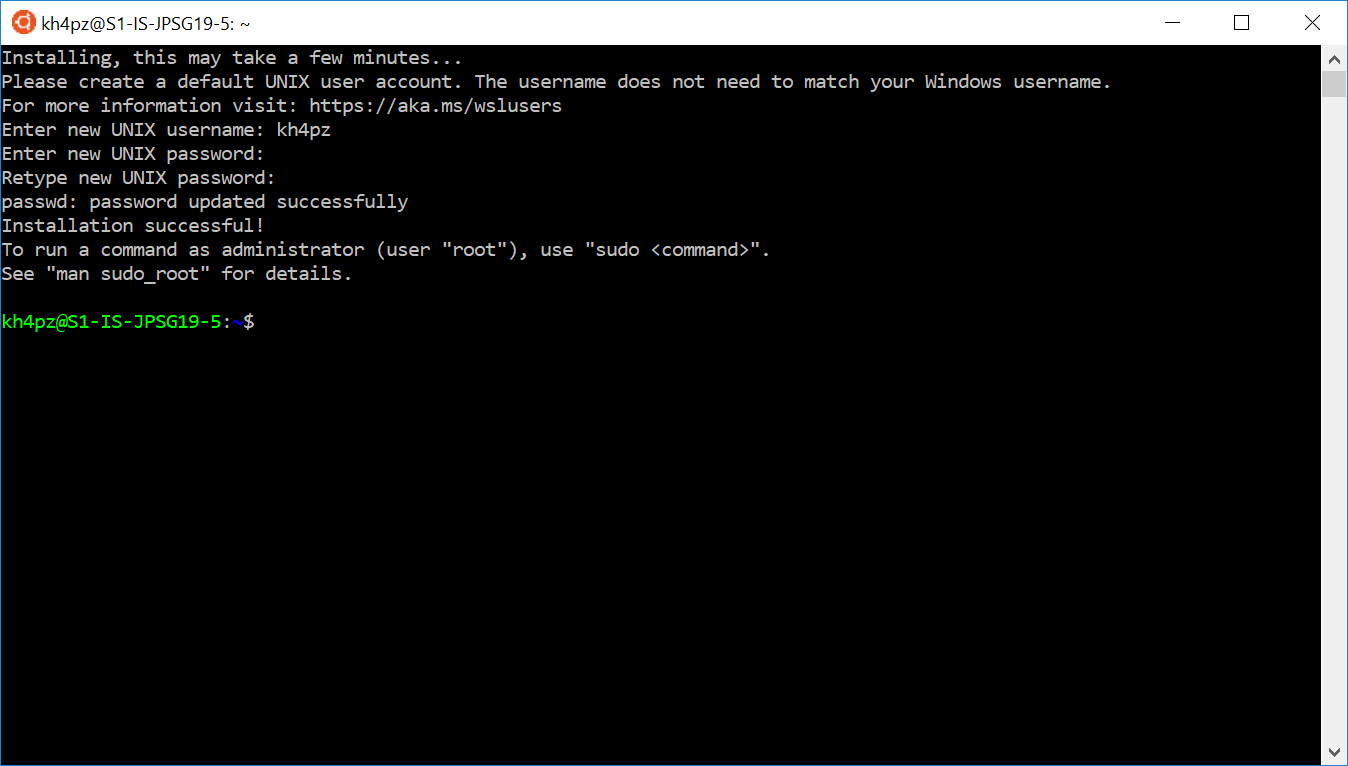
- During the process, you will be asked for a (new) username (this
does not need to match your Windows username) and a password.
(Note: when you are typing your password, no characters will
display, but your password is still being recorded. Type
carefully!)
On successful install, your terminal should look similar to that
below.
Go ahead and close the window when you're done.
- SET UP UBUNTU:
- Start Ubuntu (again) by using the start-menu and typing "Ubuntu".
- Now we will add a Linux shortcut so that to becomes easy to
use your Windows Desktop.
In the terminal, type the following exactly as shown
(or better yet, copy and paste):
         cd /mnt/c
         export uname=$(cmd.exe /c "echo %USERNAME%")
         export uname="${uname/$'\r'/}"
This will grab your Windows username and store it into the variableuname.
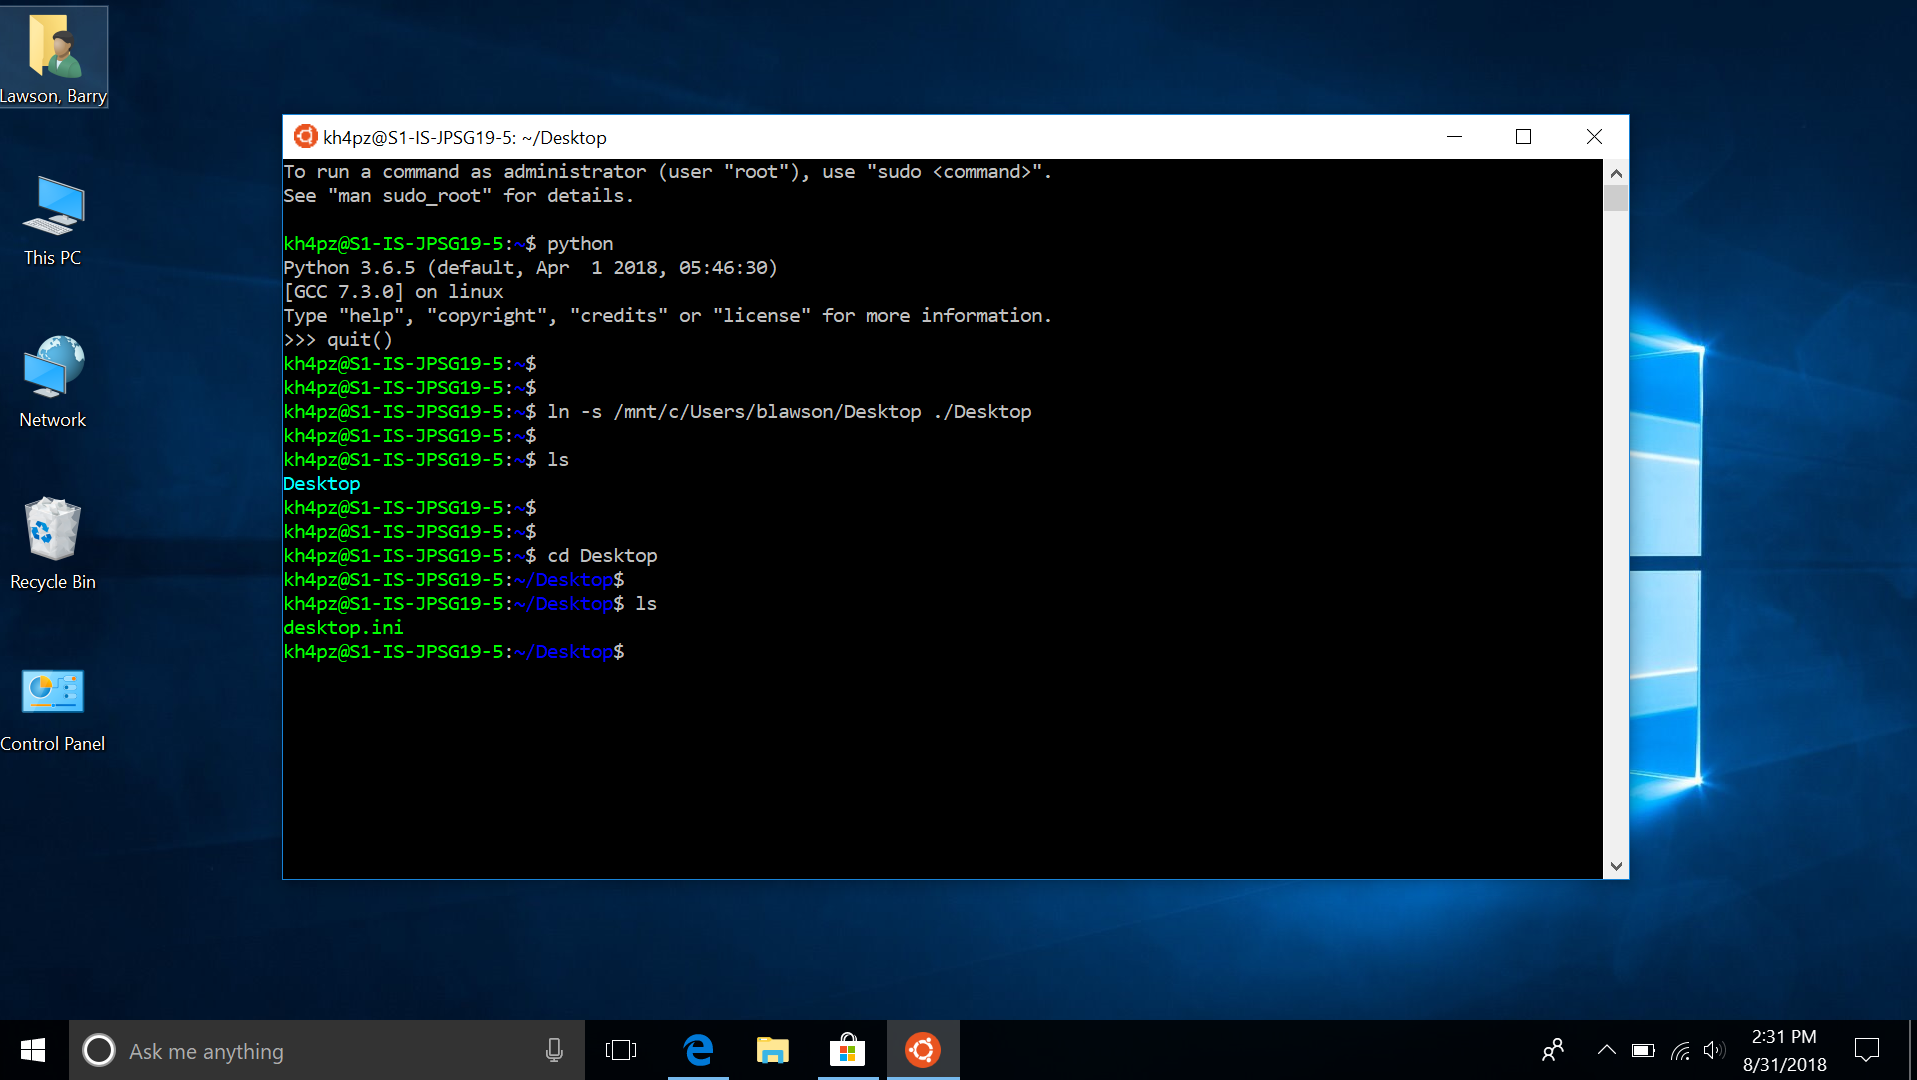
Now in the terminal, type the following:cd ls /mnt/c/Users/${uname}/DesktopIf this last command results in a "No such file or directory" error (because you are using OneDrive), type the first line below; otherwise type the second line below (you should only be typing one of the lines, not both):ln -s /mnt/c/Users/${uname}/OneDrive/Desktop ./Desktop
ln -s /mnt/c/Users/${uname}/Desktop ./Desktop(See next picture below.) - Then type "cd Desktop" to change to your (Windows) Desktop and
then type "ls" to list all the files.
(You may only see a desktop.ini file at this point, unless you have
other things on your Desktop.)
- Now we will use the terminal to create a test file, and put some
contents into the file.
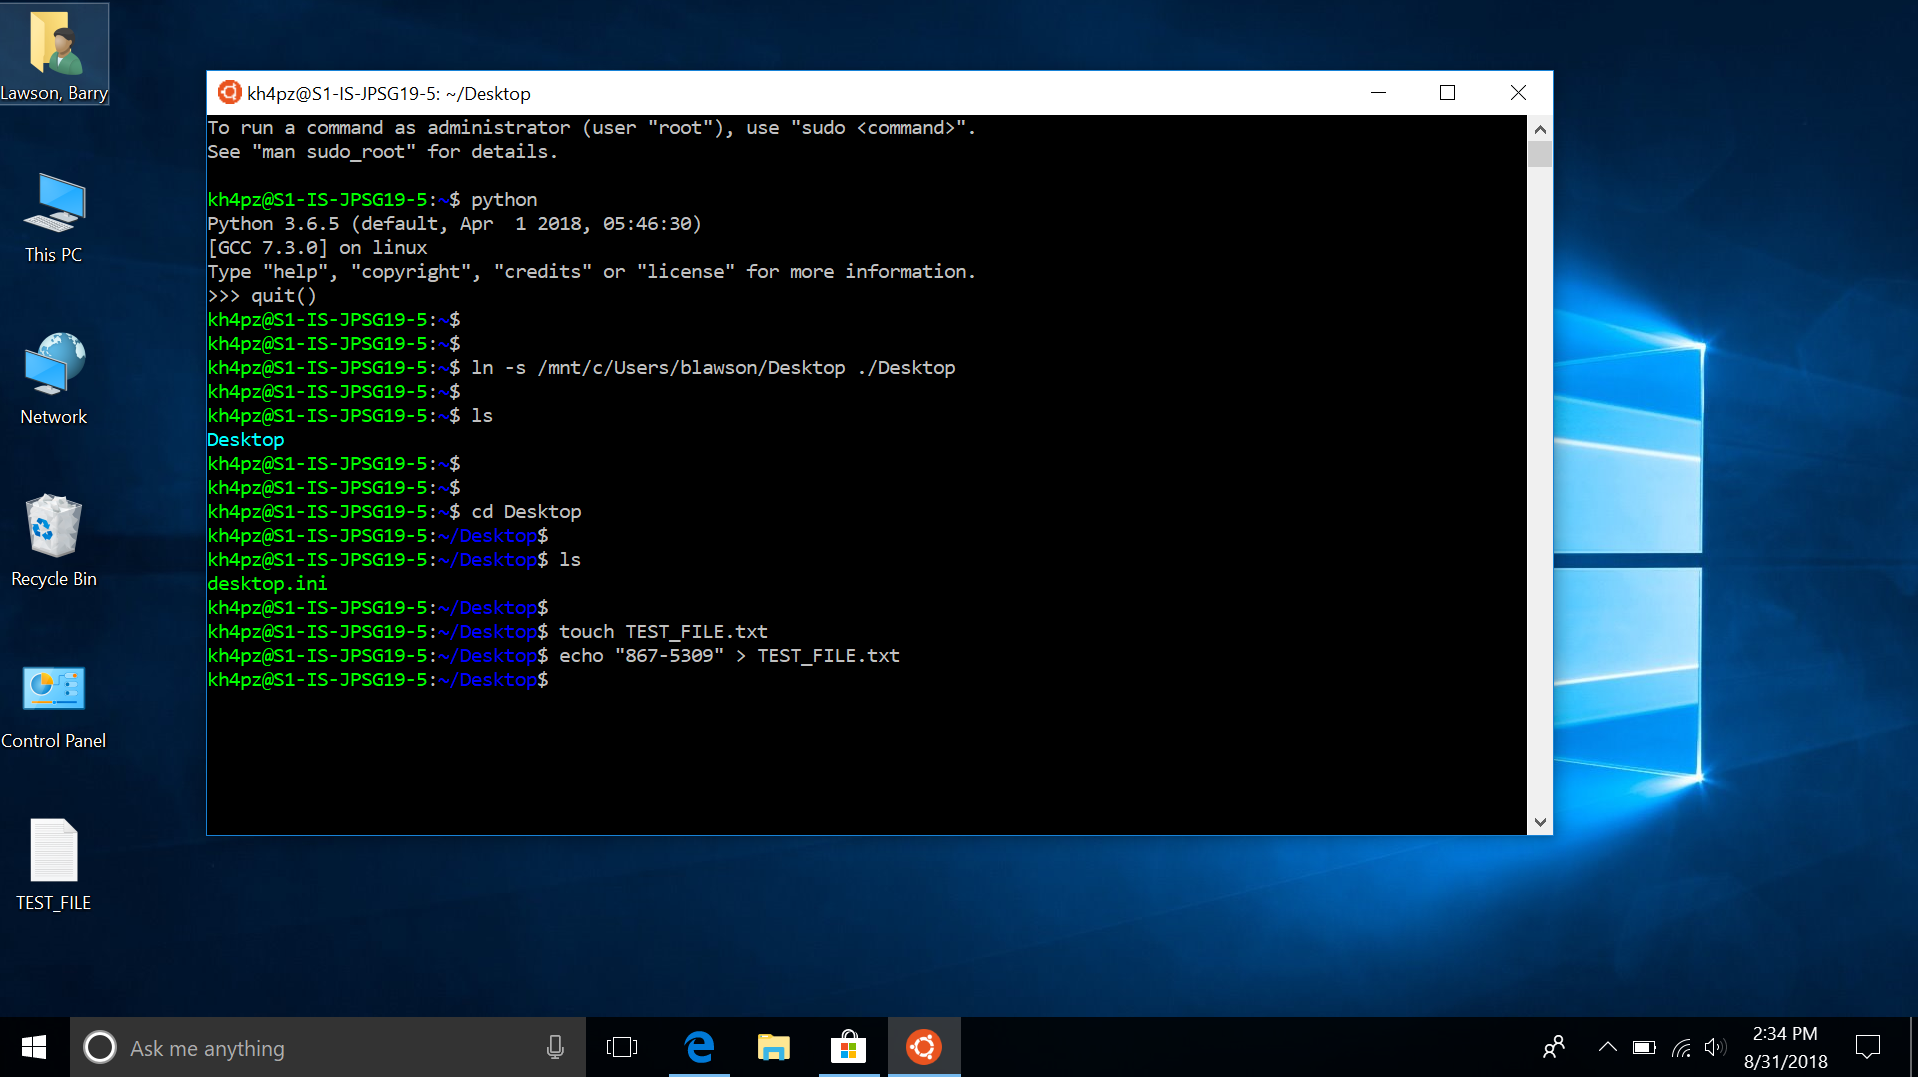
Type "touch TEST_FILE.txt", and you should see a corresponding
icon appear on your Desktop.
Try the echo command shown in the image below to put some text into
that new file.
You can double-click on the test file icon, and you should be able to
see the text you added.
- Now we'll use the terminal to create a Desktop folder (directory) for storing
your programs. In the terminal, type the following:
mkdir cmsc240
You should see the folder (directory) icon appear on your Desktop. (See next picture below for a similar result.) - You can then change into your new folder using the "cd" command,
and then do an "ls" to show that you don't yet have any files there.
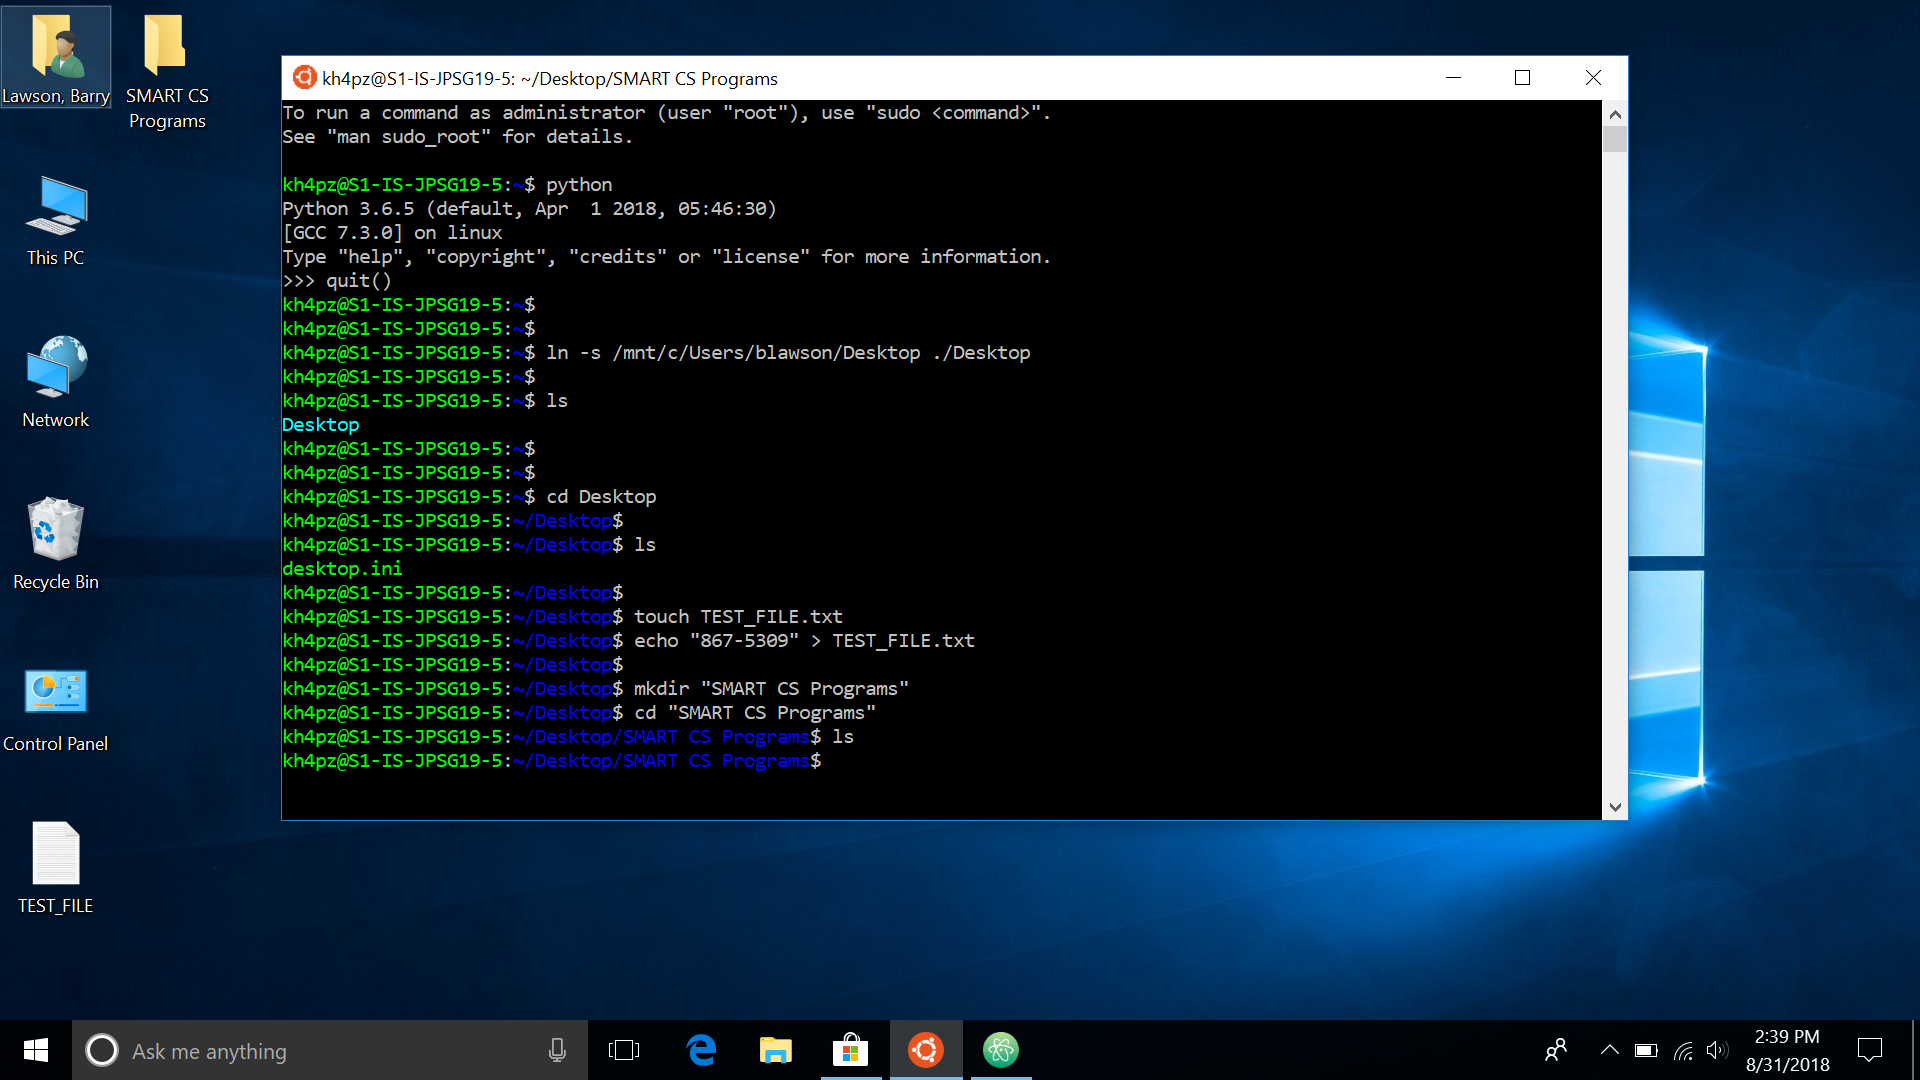
- Go ahead and close the window when you're done.
- INSTALL g++:
- Start Ubuntu (again) by using the start-menu and typing "Ubuntu".
- You will use a utility called
apt-getto install g++, but first you may need to update apt-get itself. In the terminal, type the following:sudo apt-get update
You may need to type in your Ubunutu password (which you created when creating your Ubuntu username -- this password may differ from your Windows password). (Remember: when you are typing your password, no characters will display, but your password is still being recorded. Type carefully!)On successful updating, you should see several "Get" commands stream by until you see
Reading package lists... Done - Now use
apt-getto install the g++ by typing the following in the terminal:sudo apt-get install g++
You may need to again type in your Ubuntu password.Type
Ywhen asked if you want to continue, and you should see more "Get" commands stream by. After several moments of downloads and setup processes, you should eventually seeProcessing triggers for libc-binand get your Ubuntu prompt back, indicating successful install. - Now test that g++ was installed correctly, by creating, compiling,
and executing a simple C++ program, by typing the following in the
Ubuntu terminal:
         echo '#include <iostream>' > test.cpp
         echo 'int main() { std::cout << "works!" << std::endl; }' >> test.cpp
         g++ test.cpp
         ./a.out
If g++ was successfully installed, you should seeworks!displayed in the terminal.
- INSTALL THE ATOM EDITOR:
- This should be a pretty straightforward process, following the instructions here.
- SET UP X11 FOWARDING: